

Acoustic Panels
I recently decided to upgrade my home studio by adding acoustic panels to the walls.
(links to all sites and products are in the below text – feel free to click away!)
The idea of putting in a booth seemed to be a bit much for my space, and from the recommendation of another VO Pro, I took a look at the AudiMute line of products. They have a wide variety of panels, baffles and other sound-dampening materials. Different color options and even custom print pictures are also available for an additional fee.
First, I wanted to take a look at the actual panel. AudiMute has a couple sample packs, and each comes with a coupon towards future purchase. I chose the Deluxe $35 sample pack, and it came with a $35 off coupon.
The panels themselves are well built, and use recycled materials in their construction. They’re also fire rated. And they come with a wall mounting clip that makes installation a breeze.
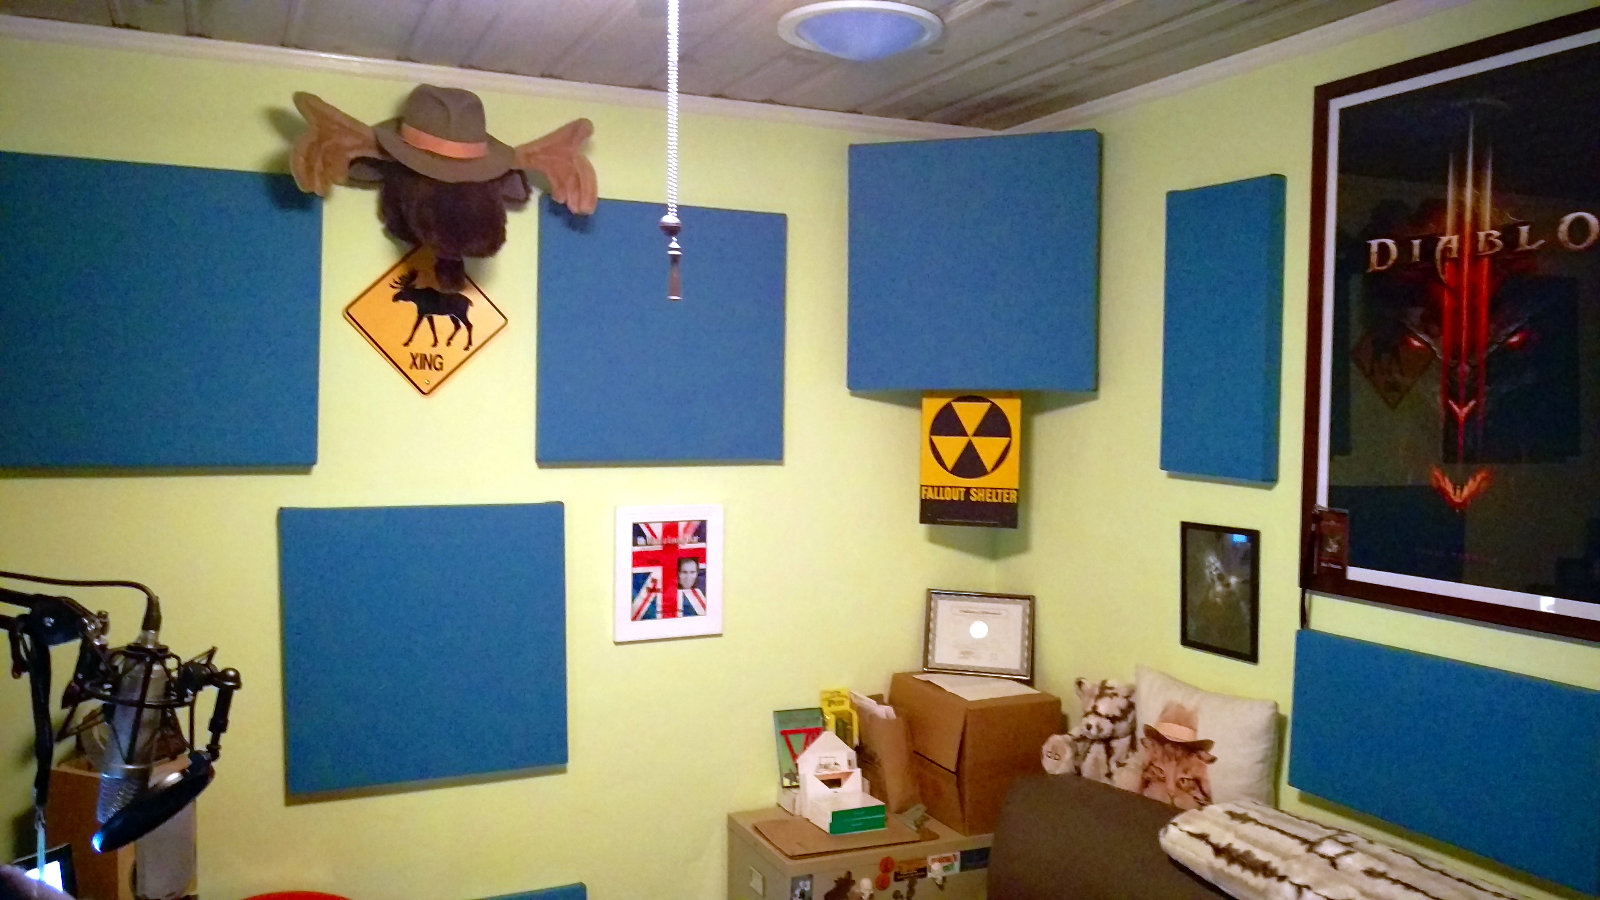
My room is about 10 ft by 12 ft, with one door, one window, and two large mirrored closet doors.
The final solution I chose was the “Starter Room Kit” which comes with 6 2’x2’x2″ panels and 6 1’x2’x2″ panels. You can also select a color option for the whole kit. I also purchased 2 bass traps for the upper room corners. They are their “Standard Acoustic Panels” 2’x2’x4″ and require a special corner mount for installation.
Once installed, it made a definite difference in echo/slapback in the room. For the window, I have heavy velvet curtains. On the door, I put one of the large panels, fastened with their Velcro Panel Security Clips. And for the mirrored closet doors, I just moved a home-made gobo in front of them.
Works like a charm!
What’s on your studio walls?
All content written and voiced by Joe J Thomas online at: JoeActor.com
Great work, Joe! I love seeing colleagues taking the time to improve their room acoustics. A $1000 mic is nothing without a decent space to work in. And, as a radio man myself, I much prefer working in the room rather than having to dive in and out of a booth in the corner.
My own acoustic solution is a mixture of acoustic foam (brought with me from my old room in London) and some home brew panels made from Roxul Safe’n’Sound in a wooden frame, with burlap on the outside. You can see the results on my website.
I’d looked at foam too, but didn’t want to mess up my walls. The Roxul is popular too – thanks for highlighting some other great options!
Pingback: Acoustic Panels - Joe's Dump | Voiceover | Sco...
Nice setup Joe! What percentage of the wall space do you figure needs to be covered in order to have the desired effect?
Hey Elie,
It depends a lot on the room and contents. I’ve got a wood ceiling, area rug and couch, so that helps.
Check out this page to get a free room analysis:
http://www.audimutesoundproofing.com/free-room-analysis.aspx
It’s a good place to start, but use your own discretion 😉
Joe
Great work Joe! I agree with Mike’s comment about working in a room rather than a booth. I’m currently having a new studio built which is larger than my current one so I’ll need some additional sound absorption.I hadn’t heard of Audimute before so I’ll have to look into them.
I used Auralex studio foam (which performs great) in my current studio. I opted to use T-pins vs. glue so it wouldn’t mess up the walls as much. You can see more about my experience here http://mccoyproductions.net/auralex-studiofoam-for-voice-over-talent/
Thanks, Jason!
I like Auralex (used it for my gobo), and the T-Pins are a cool idea.
Enjoy your new space,
Joe
hi joe — great job — looks cool too! for those looking into it — i made my panels from 1″x3″ pine frames filled with recycled denim & covered with a very breathable material (the cheapest sheets wal-mart had) — did my whole room + a 4’x4′ cloud for less than $300.
Nice that you’re handy, Todd – very creative!